One of the hardest things to teach a new shooter is the proper trigger press for a slow, precise pistol shot. The process begins with demonstrating its importance, introducing students to the intricacies of their personal equipment and, finally, overcoming involuntary movements. The procedure can be lengthy, but it is worth the time because nothing can rob you of accuracy faster than a poor trigger press.
I’ve used this drill with great success to train students on how to properly actuate the bang switch, as well as how to stave off the natural human tendency to abruptly force it to the rear or push the gun away during the process. Overall, it is a simple technique that involves elements of both live and dry practice, making it low on the round count as well.
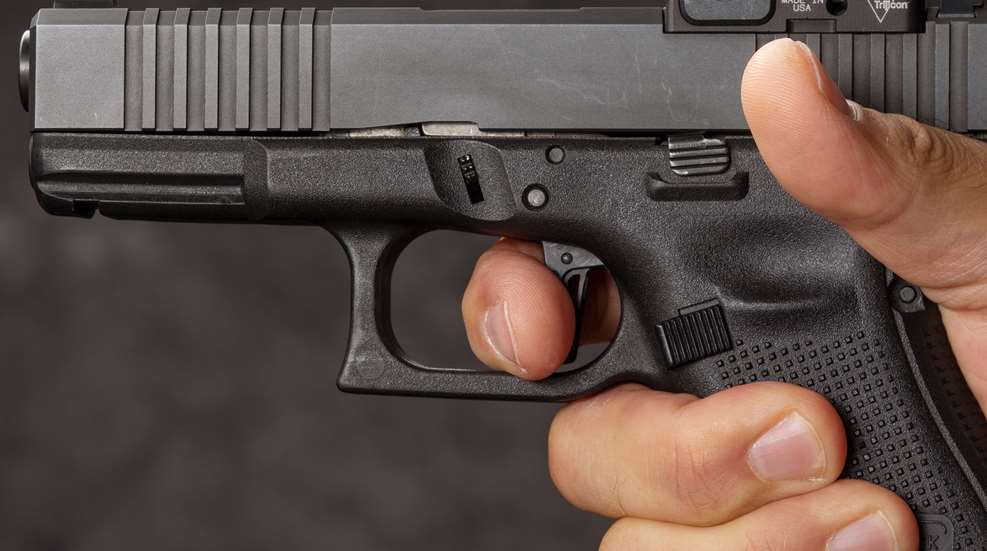
Phase One: Learning Your Trigger
Surprisingly, most shooters that need help in this department simply aren’t familiar with the individual stages of their trigger. These shooters typically start their press from outside of the trigger guard and execute the shot in one exaggerated yank.
Nearly every trigger has these three distinct elements to its movement: free travel (also called slack), a wall and, finally, a breaking point (or let-off). Free travel is at the very beginning of the trigger stroke and is the portion that requires the least amount of pressure to overcome. Next will come a stage where we feel the mechanical parts start to engage until, eventually, the trigger gets stiff (this is the wall). If we gradually increase pressure after hitting the wall, we will find the breaking point, which is the very moment the gun fires. This phase of the drill is designed to help one identify and separate each stage. It can be conducted at the range with live ammunition, but I find it most beneficial as dry practice to eliminate noise and recoil for this portion.
1. Position a bullseye target at seven yards.
2. Develop a sight picture.
3. Press your trigger through the slack and stop; repeat five times.
4. Press your trigger through the slack, stop and then press until you reach the wall; repeat five times.
5. Bring your trigger to the wall and gradually press through the breaking point in one slow, elongated motion. Do not allow yourself to stop. Repeat five times.
Phase Two: Finding the Edge
Once you are familiar with these stages of your trigger, I can begin to describe a fourth and crucial area of the stroke: the edge. I describe the edge as the absolute last portion of the movement in between the wall and the breaking point. This is where all the magic happens, as this point is where a shooter typically reverts to an aggressive yank. This is usually a function of reasoning that wants to get the subconsciously unpleasant experience of firing a shot “over with.” It’s also where a shooter might see a premature flinch, but only if reached slowly. The key is to get your trigger past the wall and play a game of getting the trigger as close to the breaking point as possible without going over. By design, it’s a game that you will invariably lose, and through the process, you’ll quell any poor habits that crept in from powering through this stage previously. This drill can also be conducted in a dry-practice environment; however, it’s important to realize that you probably won’t see any involuntary motion creep in because you know the gun isn’t actually going to fire. To that end, I highly recommend trying this drill at the range with a firearm that produces moderate recoil.
1. Position a bullseye target at seven yards.
2. Develop a sight picture.
3. Without pausing your breathing, get as close to the breaking point as possible until you eventually ride into it and the gun discharges; repeat five times.
4. Press your trigger to the wall while breathing normally. Enter your natural respiratory pause and attempt to get as close to the breaking point as possible until you eventually ride into it and the gun discharges; repeat five times.
After learning that their trigger is more complex than it seems, a shooter is poised for better manipulation as well as the beginning of working through any flinching that has gone unchecked. Through the first phase, we learn that a trigger has about as much personality as the gun itself, helping us to attack the problem from a mechanical perspective. The second phase helps us to relax and address any psychological responses that might be disturbing our precision. Knowing your exact breaking point will make for easier follow-up shots, too. Together, these skills will increase your slow-fire accuracy and prepare you for more-efficient fire under stress.